
Thermoformed Breakfast Returns That Stay Visually Light
Light breakfast bars succeed when acrylic is formed to a modest radius, a thin overhang and stool centres that do not add visual weight.
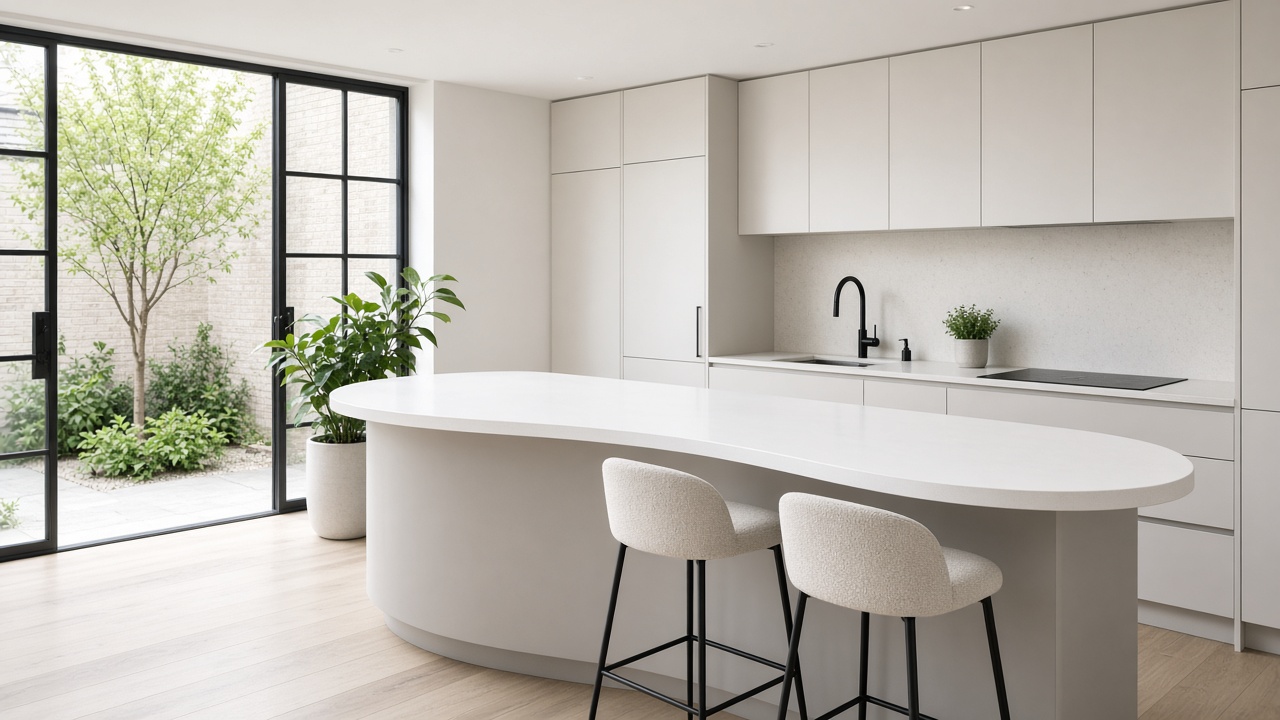
A breakfast bar should continue the thin white run, not arrive like a jetty. Go Worktops forms those returns in acrylic because the sheet can bend, whereas a stone slab can only be cut into a blunt arc that still looks heavy. Lightness is a forming decision, and the operational reason for the radius is a hip that can pass the stools.
A modest radius takes the corner off without drawing a racetrack
A radius between eighty and 150 millimetres is enough to take the corner off a return without drawing a racetrack. Larger bullnoses belong on hotel reception desks. Keep the same twelve-millimetre sheet through the curve so the eye does not meet a step. If the bar needs more stiffness, add under-build behind the radius, never a thicker nose on the seating side. Form eighty to 150 millimetre radii; skip the hotel-scale bullnose. Continue any upstand only to the point the wall ends. Do not carry a splash around a free-standing curve; it adds a little wall where you wanted air.
A support leg under a thin bar should be a pale metal or a matching acrylic panel set back from the edge. A chunky timber post undoes the handleless idea in one vertical.
Overhang, stool centres and a support you should barely see
Overhangs of 250 to 300 millimetres take a slim stool. Four hundred millimetres wants a thicker structure and starts to look like a table bolted to the kitchen. In a courtyard with a three-metre island, 280 millimetres is usually plenty. Mark the stool centres on the template: 600 millimetres between guests stops elbow wars without lengthening the bar into a runway. Keep seating overhang near 280 millimetres on a thin white bar. Space stools at 600 millimetres and hide any support behind the line.
Brace the overhang without thickening the visible seating nose. Teenagers who perch are a load; say so on the quote so the under-build can be specified without thickening the edge you can see.
- Form eighty to 150 millimetre radii; skip the hotel-scale bullnose.
- Keep seating overhang near 280 millimetres on a thin white bar.
- Space stools at 600 millimetres and hide any support behind the line.
Heat and a mould, not a collage of mitres under the lip
Thermoforming is heat and a mould, not a collage of mitres. Ask to see how the fabricator will support the curve while it cools. A poorly formed radius can oil-can and catch the light as a ripple, which on a high-key white is as visible as a scratch. A quartz-look stack of bonded strips will always show a joint on the underside of the overhang; sit at the stool and look up before you agree to that method.
Continue the same colour code through the curve. A second white on a breakfast return is a courtyard mistake you cannot unsee.
Thin still has to take a laptop, a kettle and a leaning adult
Thin does not mean fragile if the cabinet rails are at 600 millimetre centres and the overhang is braced. A laptop and a kettle are normal loads. A standing adult leaning on the nose is the load to design for. Keep sockets in the end gable or in a slim pop-up well behind the curve, never in the seating rim. A white bar with a black socket on the lip is no longer airy. Wipe the curve with the same non-abrasive cream as the main run; the formed area is still through-colour acrylic, so a later scuff can be blended.
Put power in a gable or a set-back well, never on the stool rim. When the fitter leaves, sit on a stool and look along the crescent. You should see air, not a joint.
- Brace the overhang without thickening the visible seating nose.
- Put power in a gable or a set-back well, never on the stool rim.
- Inspect the underside of the curve for joints before you approve the method.
Next step with Go Worktops
Order a sample, then request a fitted quote or browse the worktop collection. The colour should be judged in your own daylight before anyone templates the run.